Elements Mobile Protection Android app with Microsoft Intune MDM
A collection of short easy steps to get started in taking the product into use
Follow the steps below to deploy the WithSecure Elements Mobile Protection app with Microsoft Intune MDM to Android devices.
Step 1 - Adding the Android app to Microsoft Intune MDM
Before you integrate WithSecure Elements Mobile Protection with your MDM, make sure that the following prerequisites are met:
- You have enrolled your end device
- You have set the profile with policy restrictions
Note: WithSecure does not provide support for or instructions related to profiles and policies, unless specifically mentioned.
- An internet connection for setting up the VPN and permissions for the files
- A valid WithSecure Elements Mobile Protection subscription
To add the app to Intune MDM:
- Log in to your Microsoft Intune portal.
- Select Apps > Android > Add.
The Select app type pane opens.
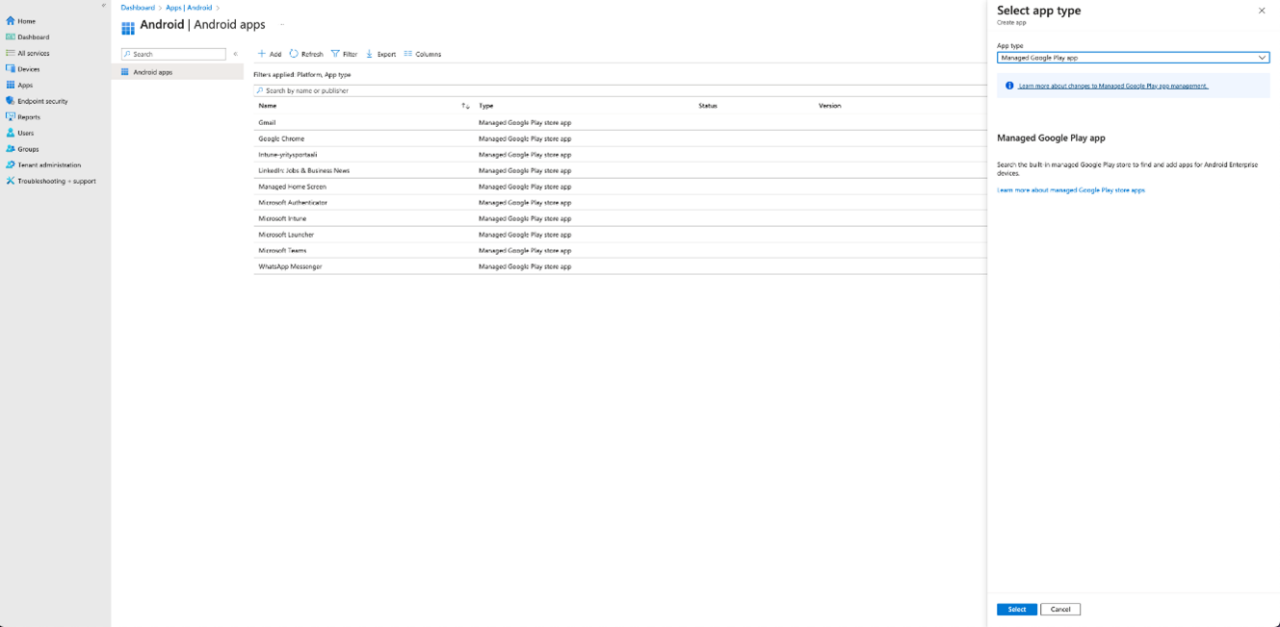
- From the App type drop-down menu, select Managed Google Play app, and then select Select
- In the Managed Google Play view, in the Search field, enter WithSecure Elements.
The Apps view opens.
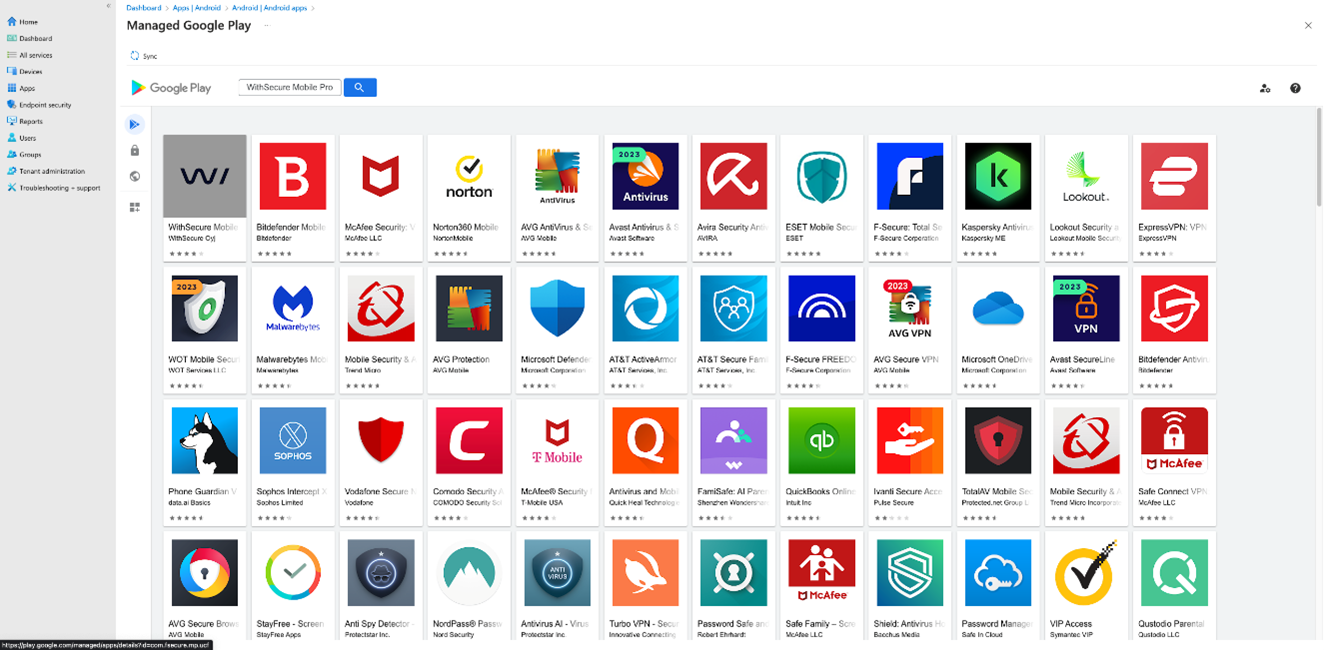
- Select WithSecure Elements Mobile Protection.
- On the view that opens, select Approve > Approve.
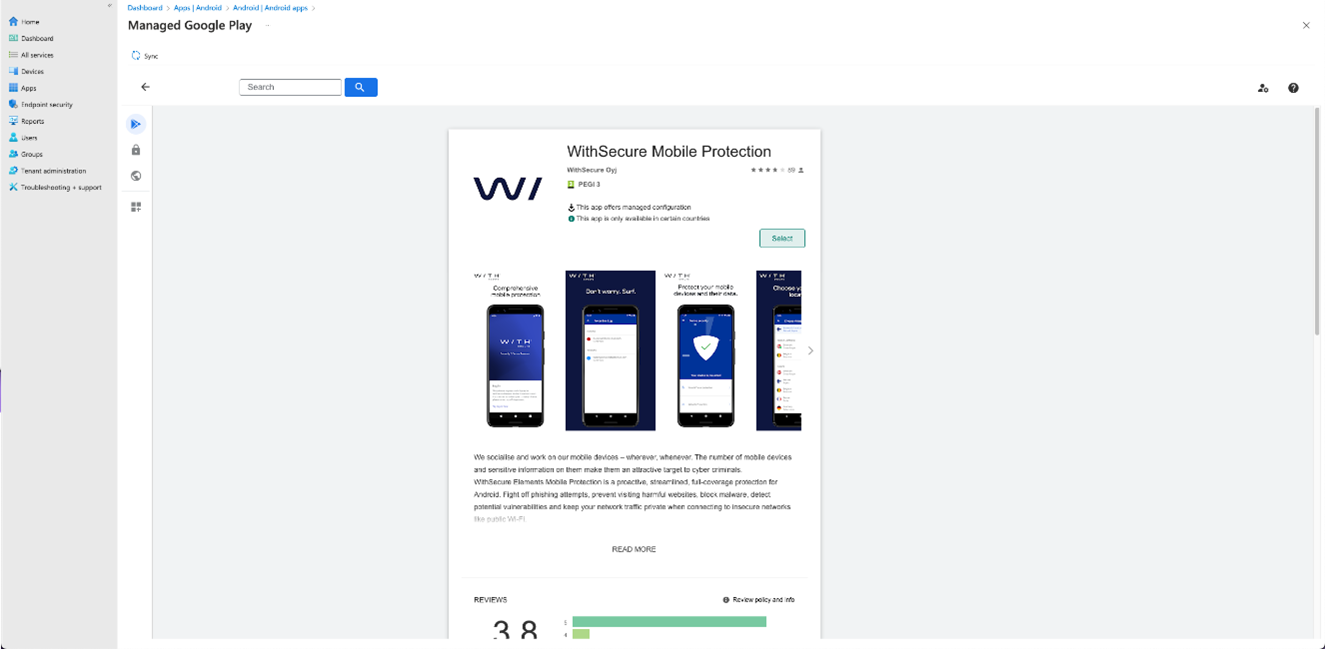
- In the Approval settings tab, select Keep approved when app requests new permissions, and select Done.
The Managed Google Play view opens. - Select Sync at the top left corner.
The Android Apps view opens.
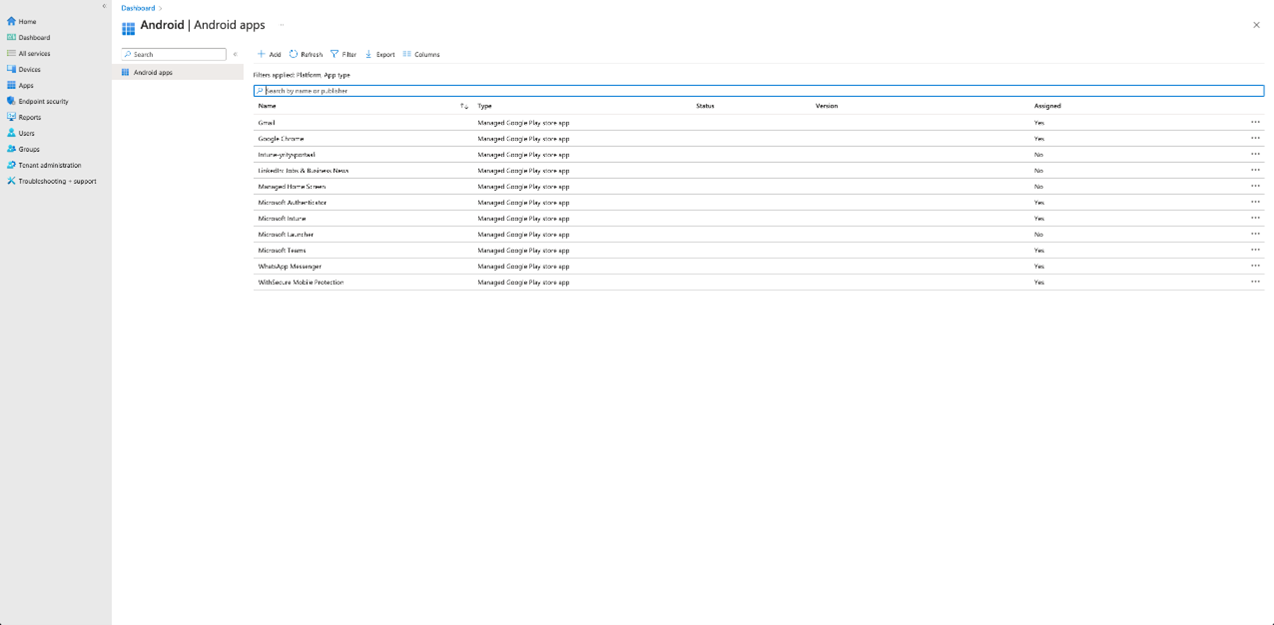
- Select Refresh and then select WithSecure Elements Mobile Protection.
The WithSecure Elements Mobile Protection view opens.

- Under Manage, select Properties.
The WithSecure Elements Mobile Protection Properties view opens. - Next to Assignments, select Edit.
The Edit Application view opens.
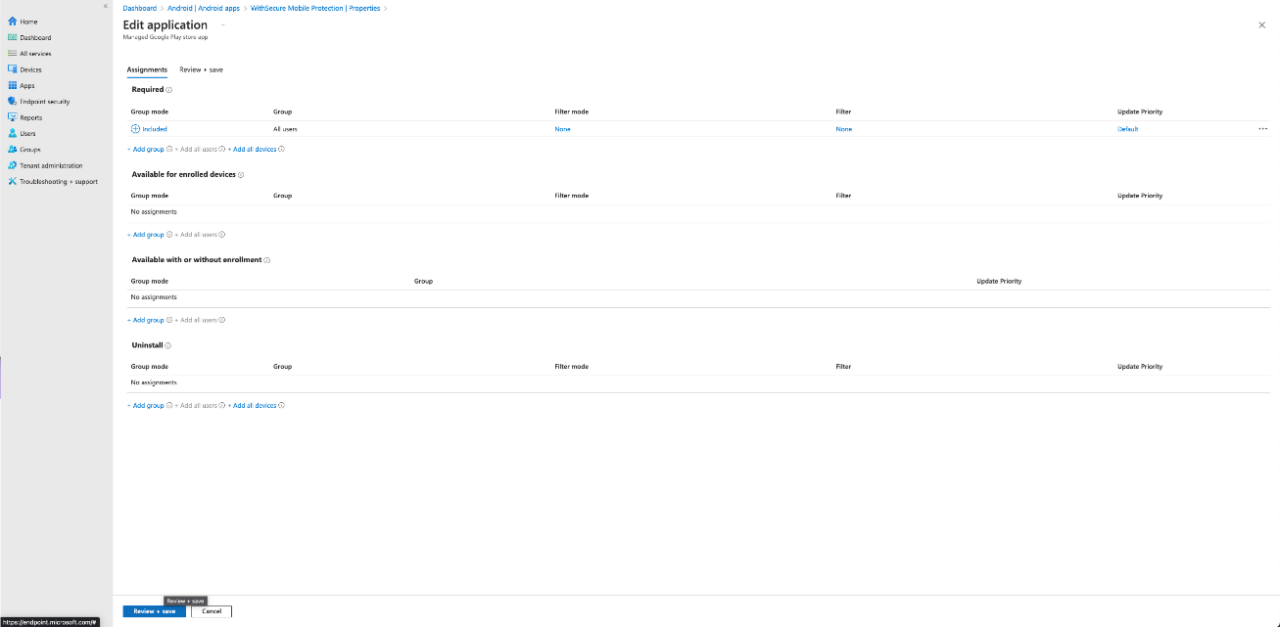
- In the Assignments tab, do the following:
- Under Required, select Add all users.
- Select Review + save.
- In the Review + save tab, select Save.
The WithSecure Elements Mobile Protection app has been added to Microsoft Intune MDM.

Next, add the app configuration policies.
Step 2 – Adding the Android app configuration policies
Instructions on how to add the WithSecure Elements Mobile Protection configuration policies for managed Android devices.
- Select Apps.
The Apps overview pane opens. - Under Policy, select App configuration policies.
- Select Add > Managed devices.
The Create app configuration policy pane opens.
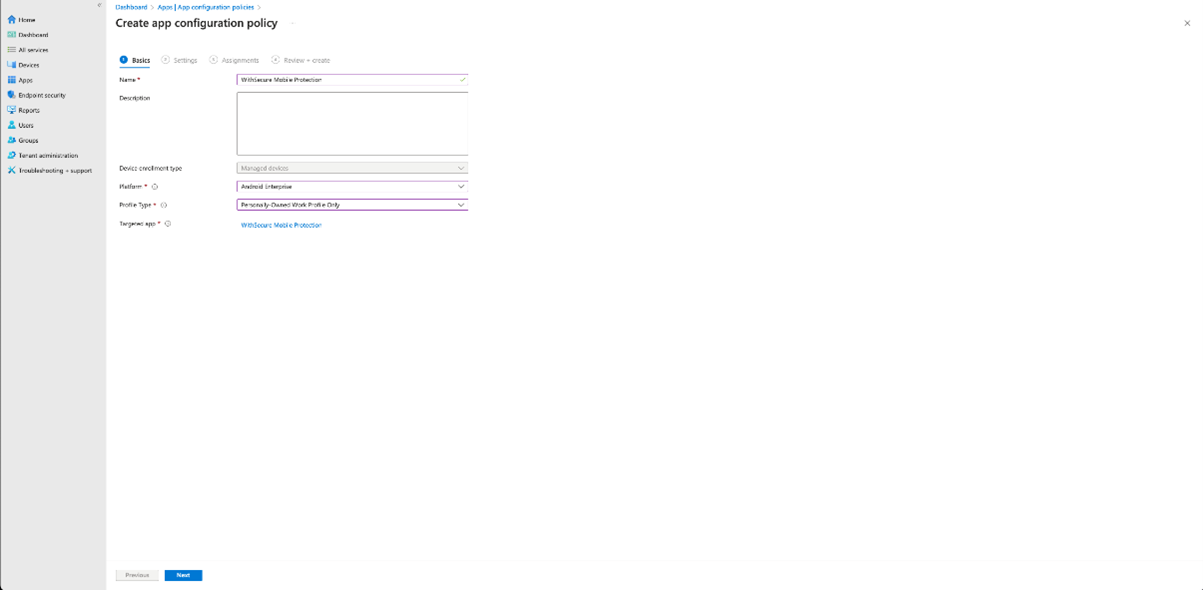
- In the Basics tab, do the following:
- In the Name field, enter WithSecure Mobile Protection.
- From the Platform drop-down menu, select Android Enterprise.
- From the Profile type drop-down menu, select Personally-Owned Work Profile Only.
- Next to Targeted app, select Select app. The Associated app pane opens.
- Select WithSecure Elements Mobile Protection, and select OK > Next. The Settings tab opens.
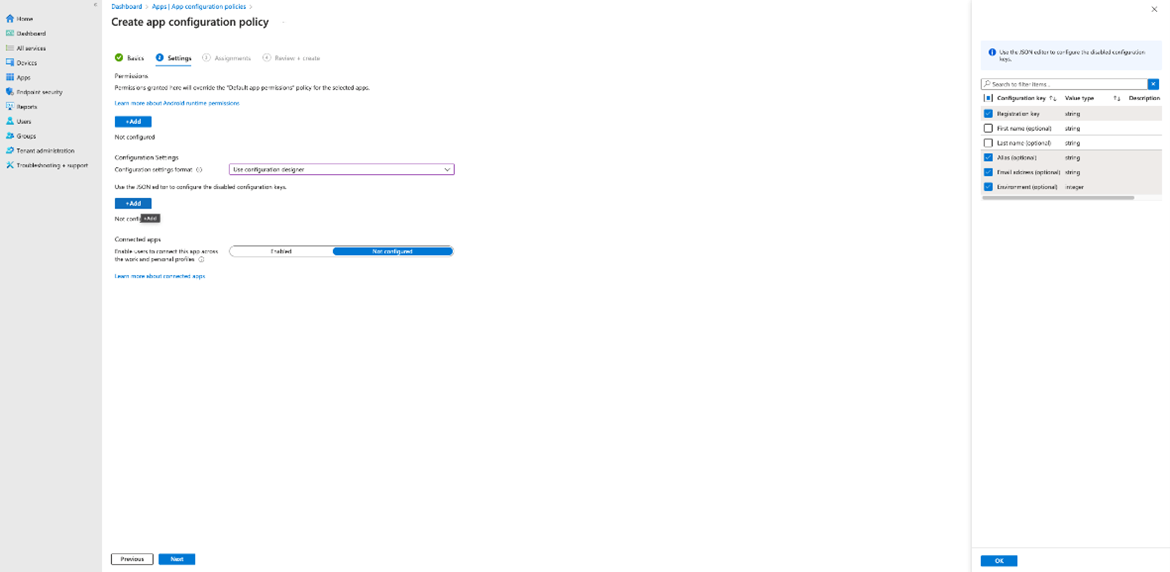
- Do the following:
- Under Configuration Settings, from the Configuration settings format drop-down menu, select Use configuration designer.
- Select +Add.
- On the pane that opens at the right, select the following: · Registration key · Alias (optional) · Email address (optional) · Environment (optional)
- Select OK.
- Select the value types and enter the configuration values for the following configuration keys:
- fate_registration_key: value type: String; configuration value: [WithSecure Elements Mobile Protection subscription key]. Note: You can find the WithSecure Elements Mobile Protection subscription key in the WithSecure Elements Security Center under Endpoint Protection > Subscriptions.
- alias: value type: String; configuration value: {{username}}
- email: value type: String; configuration value: {{mail}}
- env: value type: Integer; configuration value: 2
- Select Next.
The Assignment tab opens.
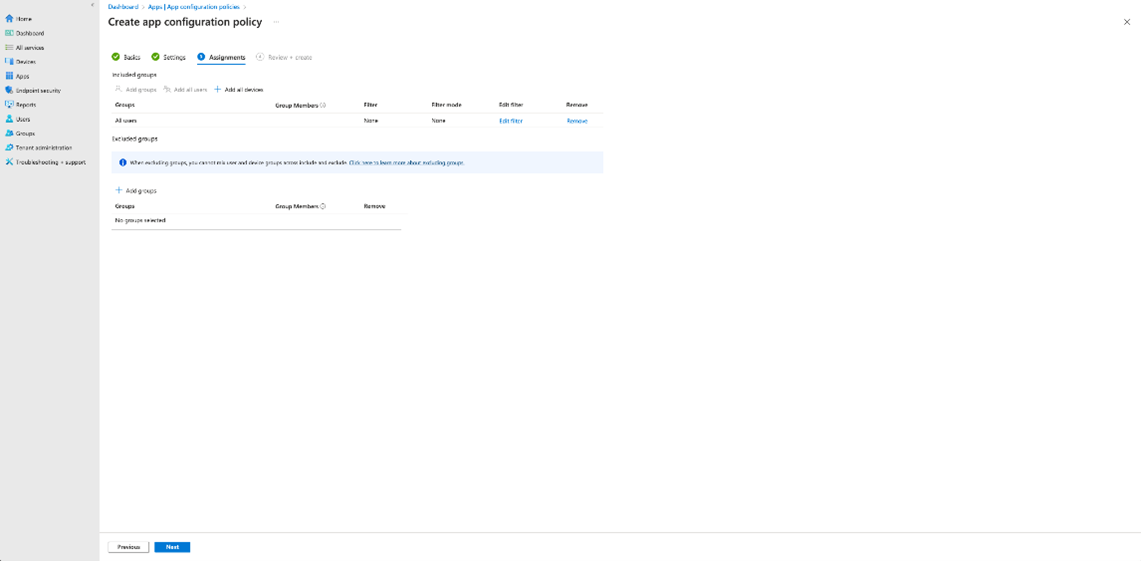
- Under Included groups, select Add all users and select Next.
The Review + create tab opens.
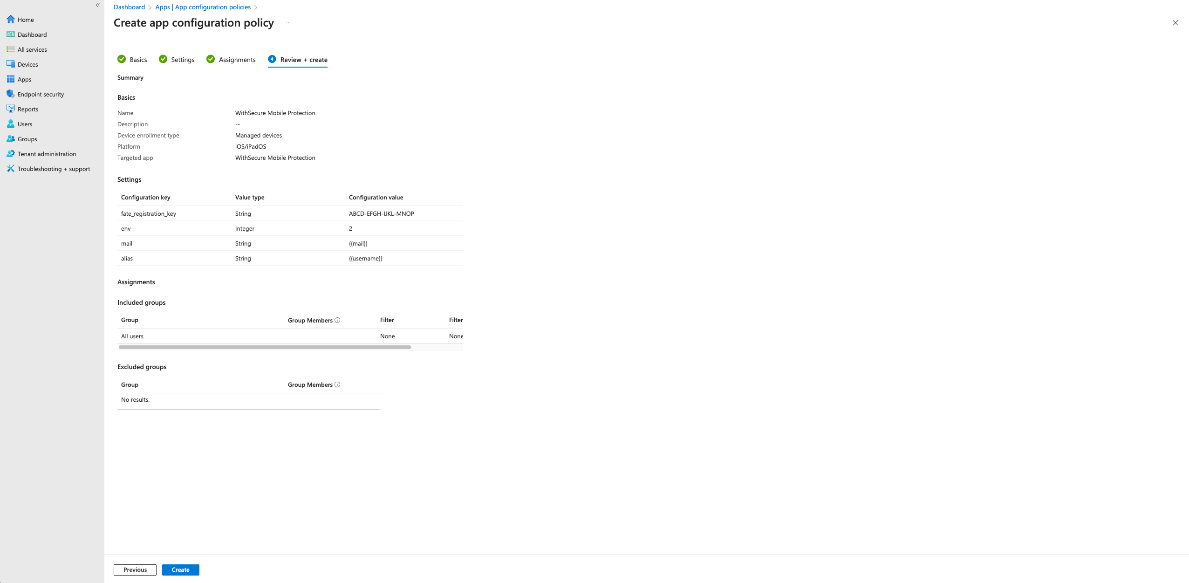
- Select Create.
The app configuration policy was created and assigned.
You need to install the app on an Android device.
Step 3 – Granting permission to an app
Instructions on how to grant permission to an app for a silent activation.
- Log in to the Microsoft Endpoint Manager administrator center.
- Select Apps > App configuration policies > Add > Managed devices.
Note: You can choose to add either managed devices or managed apps. For more information, see Apps that support app configuration. - On the Basics page, enter the following details:
- Name - a name for the profile that is shown in the portal
- Description - a description for the profile that is shown in the portal
- Device enrollment type - the default option is Managed devices
- Under Platforms, select Android Enterprises.
- Next to Targeted app, choose Select app.
The Associated app pane opens. - On the Associated app pane, select the managed app that you want to associate with the configuration policy, and select OK.
- Select Next > Add.
The Add permissions pane opens. - Select the permissions that you want to override.
Note: The granted permissions override the default app permissions policy for the selected apps. - Set a permission state for each permission. You can select from the following options:
- Prompt - ask the user to accept or deny
- Auto grant - automatically approve without notifying the user
- Auto deny - automatically deny without notifying the user
- Select Review + save.
Your settings are saved.